
FDNY Fire Marshal Badge Wallets: Order for the Badge You Actually Carry

An FDNY Fire Marshal badge wallet has two jobs: hold the badge properly and work as a wallet the rest of the day. Getting the cutout right matters, but so does choosing a useful card layout and dealing with any hardware that holds the badge too far off the leather.
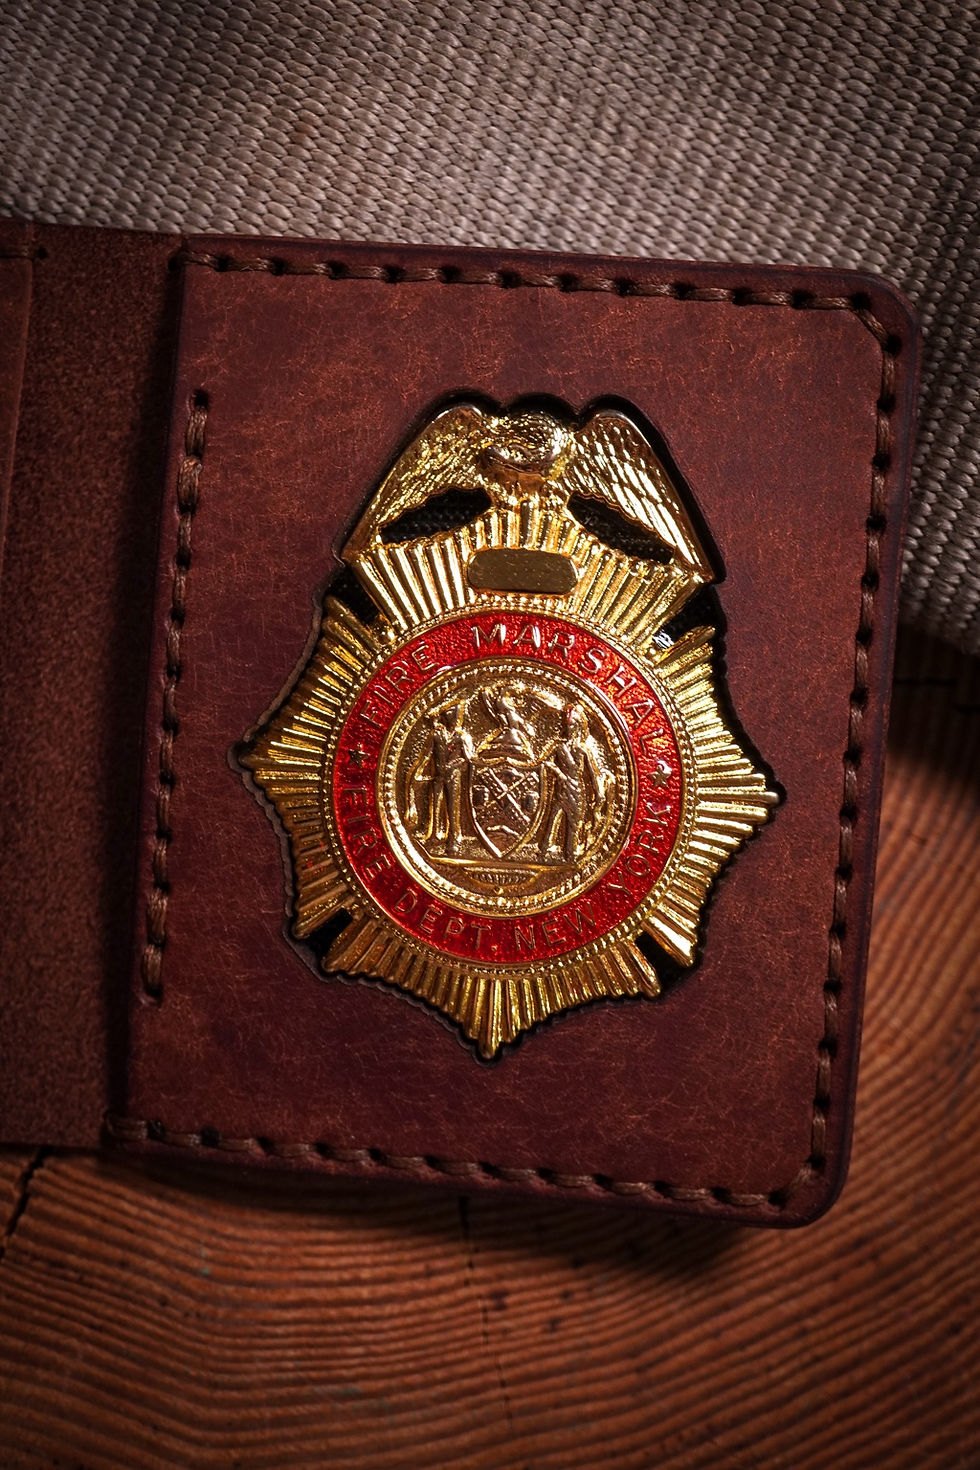
The brown wallet shown here pairs the Fire Marshal badge with an ID window. If you want something similar, start with the badge you carry, then use the choices below to decide which layout earns its place in your pocket.
Check the whole Fire Marshal outline
Our FDNY Fire Marshal template gives you a full-size outline to compare with your badge. Print it at Actual Size or 100%, then measure the printed reference rectangle: it must be 100 mm long. Turn off Fit to Page.
Lay the badge over the tracing on a flat surface. Check the eagle and wings at the top, the outer rays at the sides and the bottom edge. Measuring only the circular centre leaves out part of the badge that the leather needs to accommodate.
If one section falls outside the outline, photograph that section with the badge resting on the verified printout. Include its overall width and height when you get in touch. That tells us much more than “it looks a bit bigger” and helps settle the fit before you choose colours.
Use the Fire Marshal pattern for a matching Fire Marshal badge. Another FDNY badge or a colleague's holder can be a useful visual reference, but the same department name does not establish the same cutout.
Choose a layout for the way you carry
Once the outline is confirmed, decide what needs to sit beside the badge. You can keep this simple:
Your priority | Model to compare first |
Cards and a straightforward badge layout | The Core |
Identification visible through a window | The Outlook |
A dedicated place for regularly carried cash | The Billfold |
The Core and Outlook both measure 3⅜ × 4 inches closed and list a maximum badge size of 68 × 90 mm. The Billfold measures 3¾ × 4 inches closed and lists the same badge limit, with room for cash. These are model specifications; your Fire Marshal outline still needs to be checked.
For an ID-window layout, the Outlook's opening measures 44 × 79 mm. Cut an opening that size in a piece of paper and place it over your ID to see which information would show. This checks visibility; it does not establish whether an unusually sized credential fits the pocket behind the window.
If the badge rocks or the wallet feels bulky

Look at where the extra thickness comes from before ordering a different wallet. A wider model gives a badge more room across the leather. Hardware projecting from the back is a separate issue.
What you notice | What to check |
The badge edge does not follow the cutout | The outline and badge version |
The badge stands proud or rocks against the backer | The rear attachment and its depth |
The wallet closes poorly after you add cards | The card load as well as the badge mounting |
Compare your badge with the examples on our Badge Attachments page. A screw and post, wallet clip, safety pin and flat back need different arrangements. For a Velcro setup, our wallet backer has the hook side and the badge needs the soft loop side.
A useful mounting enquiry includes one front photo, one rear photo and a side view showing how far the hardware projects. If you are considering removing hardware to reduce bulk, discuss the badge first. There is no reason to alter it simply because you are unsure which attachment to choose.
Choose the finish, then ease into daily use

Brown leather with matching thread gives the pictured badge a warm, understated setting. You can choose the exterior, interior and thread colours separately, and request initials or a badge number with the placement specified. Check those details together so the order describes the finished wallet you want.
Hammer & Axe is first responder-owned, and our wallets are handmade in Canada from full-grain vegetable-tanned leather, hand-sewn with waxed Ritza Tiger thread. New leather feels firm. With use it breaks in, darkens and develops a natural shine and patina.
Begin with one or two cards per pocket and build up gradually if needed. A pocket stretched around several cards may feel loose if you later go back to one, so carrying only your regular cards is a useful starting point.
Ready to order? Choose your layout through Build Your Own, select the matching agency and attachment, and add your colours and personalisation. This is a wallet for your badge; the badge shown in the photographs is not included with the wallet purchase.


Comments