
Canadian Forces Military Police Badge Wallets: Keep the Badge and ID Easy to Use

A Canadian Forces Military Police badge wallet needs to make sense when it is open as well as when it is in your pocket. The badge needs the right cutout, identification needs a useful place, and your everyday cards should remain easy to reach.
The brown leather and red stitching in these photographs frame a bilingual MILITARY POLICE / POLICE MILITAIRE CANADA badge. If you are planning your own version, start with how you use your identification. That decision narrows the layout choices before you spend time choosing colours.
Start with how you use your ID

There are two useful questions: do you want to see the card through a window, and do you regularly need to remove it? A visible window can help with a quick visual check. It does not remove the need to take a card out when that is required.
Lay out the cards you actually carry and separate your work identification from payment cards and occasional-use cards. Decide which card you want to see first when the wallet opens. This turns “I need an ID wallet” into a clear layout requirement.
Follow your own requirements for carrying and presenting issued identification. The comparisons below explain our wallet layouts; they do not establish what your organisation requires you to carry.
Compare window size and badge space together
Model with an ID window | Published dimensions |
44 × 69 mm window; badge up to 57 × 90 mm; 3 × 4 inches closed | |
44 × 79 mm window; badge up to 68 × 90 mm; 3⅜ × 4 inches closed |
The Outlook's listed window has one dimension 10 mm larger, and its badge limit is wider. That can make the larger model worth comparing, but neither specification confirms a match with your particular badge or credential by itself.
Try this before choosing: cut a 44 × 69 mm opening in scrap paper, then a 44 × 79 mm opening in another piece. Place each over the identification you want visible, in the orientation shown in the product photos. Check the name, photograph and any other information you need to see. You can do this at home without sharing a photograph of the credential.
A viewing opening is different from the pocket behind it. If the card itself is unusually sized, give us its outer dimensions and ask about the fit. Do not trim the card to suit a wallet.
Confirm the Canadian Forces Military Police outline

Use our Canadian Forces Military Police template for the badge check. Print at Actual Size or 100%, then verify the 100 mm reference with a ruler. Place the badge over the tracing and compare the complete perimeter.
Match the physical badge to the named pattern rather than selecting a general military or police opening. The bilingual lettering in our photographs helps identify the example, but the edge profile and dimensions determine the cutout.
If your badge differs, show where it departs from the tracing and provide its widest and tallest measurements. Leave identification cards out of the photo; the badge and scale reference are what help us assess this part of the order.
Check mounting depth before adding more cards
The back of the badge determines the attachment option. Our Badge Attachments guide shows the supported arrangements, including screw and post, snap, clip, safety pin, flat back and Velcro.
For Velcro, the soft loop side belongs on the badge, while the wallet backer has the hook side. If your badge already has projecting hardware, selecting Velcro at checkout does not make that hardware disappear. Send a rear and side photograph if a change is being considered so the mounting can be discussed first.
Once the wallet arrives, start with one or two cards per pocket. New leather is firm and will loosen gradually with use. A pocket stretched for a larger stack may stay loose when you return to one card, so build up only to the capacity you need.
Put the fit, layout and finish into one order
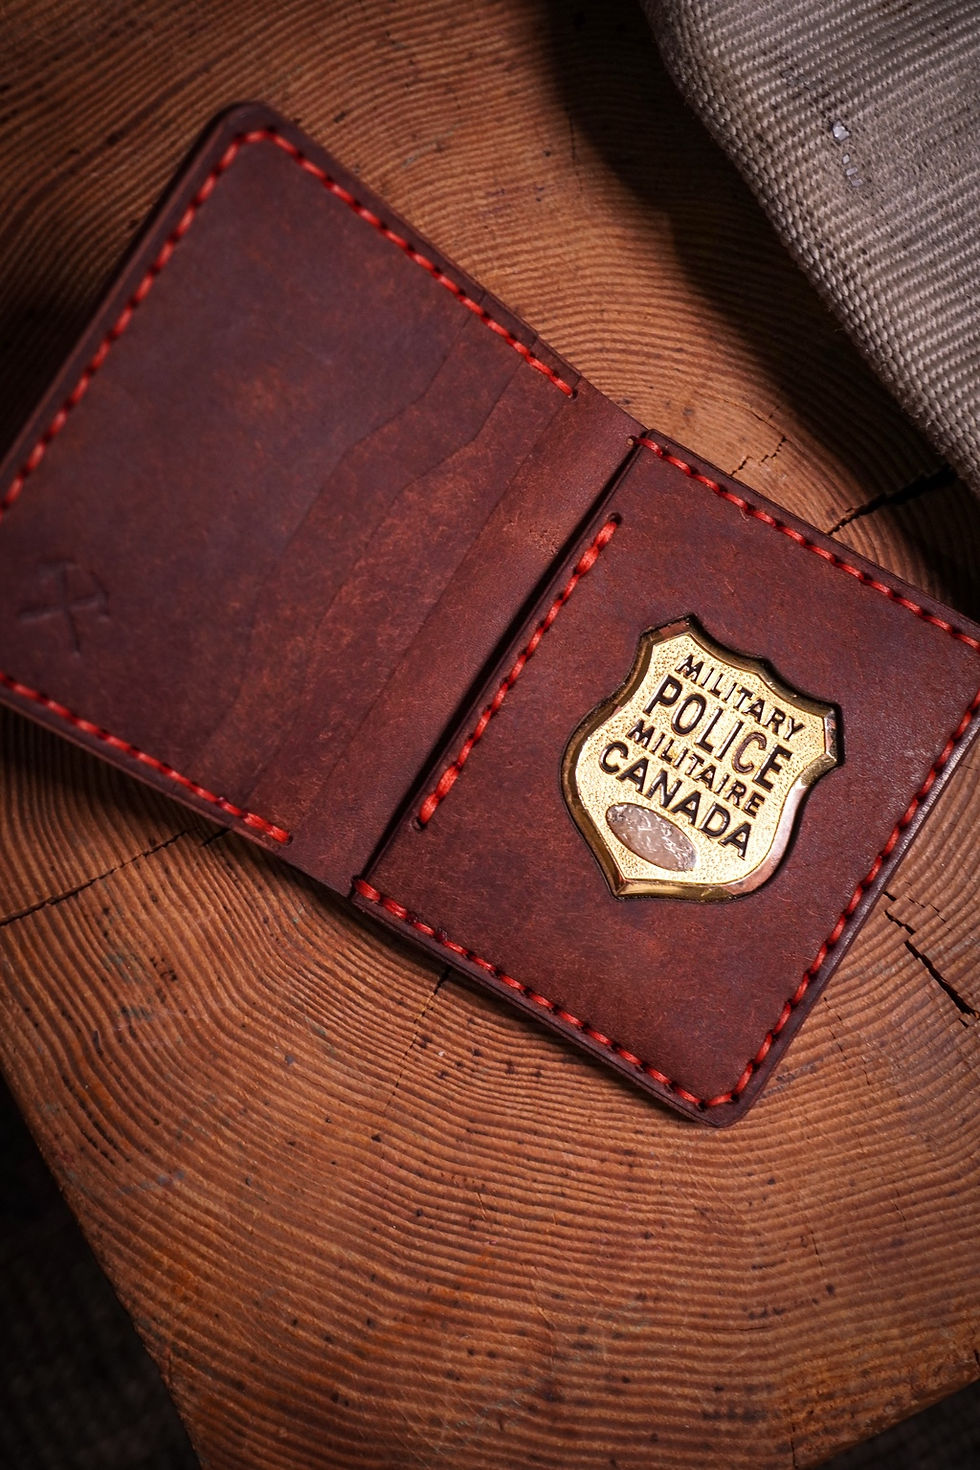
The brown-and-red combination shown here is one way to personalise the wallet. Exterior leather, interior leather and thread can be chosen separately. Confirm any initials or badge number and the requested placement before submitting the order.
Our wallets are handmade in Canada by a first responder-owned business, using full-grain vegetable-tanned leather and hand stitching. The leather develops its own patina, becoming darker and smoother with a natural shine as it wears in.
Before checkout, you should be able to name the badge pattern, the rear attachment, your preferred wallet layout and the information you need visible. If those are settled, Build Your Own brings the remaining choices together. If one is uncertain, send that specific question first so the finished wallet suits the badge and identification you already carry.


Comments